


Once your fat is prepped, you can either wet render or dry render the fat.
Wet rendering:
Wet rendering, as its name implies, uses water to render the fat. This method works best with bird skins because the fat can’t really be removed from the skin before rendering. This is also a good method for rendering smaller batches of fat from other animals. The use of water allows for gentle, even heat distribution, allowing the fats to render while preventing the proteins from burning. Once the fat is rendered from the skin and meat, the water will need to be removed. You can do this one of two ways- you can evaporate out the water by continuing to gently simmer it, or you can allow it to cool completely, so the fats will solidify on top of the water and can be scooped out.
-
Place cleaned and cut fat in a heavy bottomed pan. Add water to the pan, at about a 3:1 ratio of fat to water. For example, if you have 3 quarts of fat, add 1 quart water. Heat on medium heat until the water starts to simmer.
-
As the water heats up, the fat will start to melt. Stir and adjust heat to maintain a steady simmer.
-
Keep checking your fat until it looks like it’s all rendered. Depending on how much meat and skin was left on it, there may be some solids floating in the pot, but otherwise it should be a clear yellowish liquid.
-
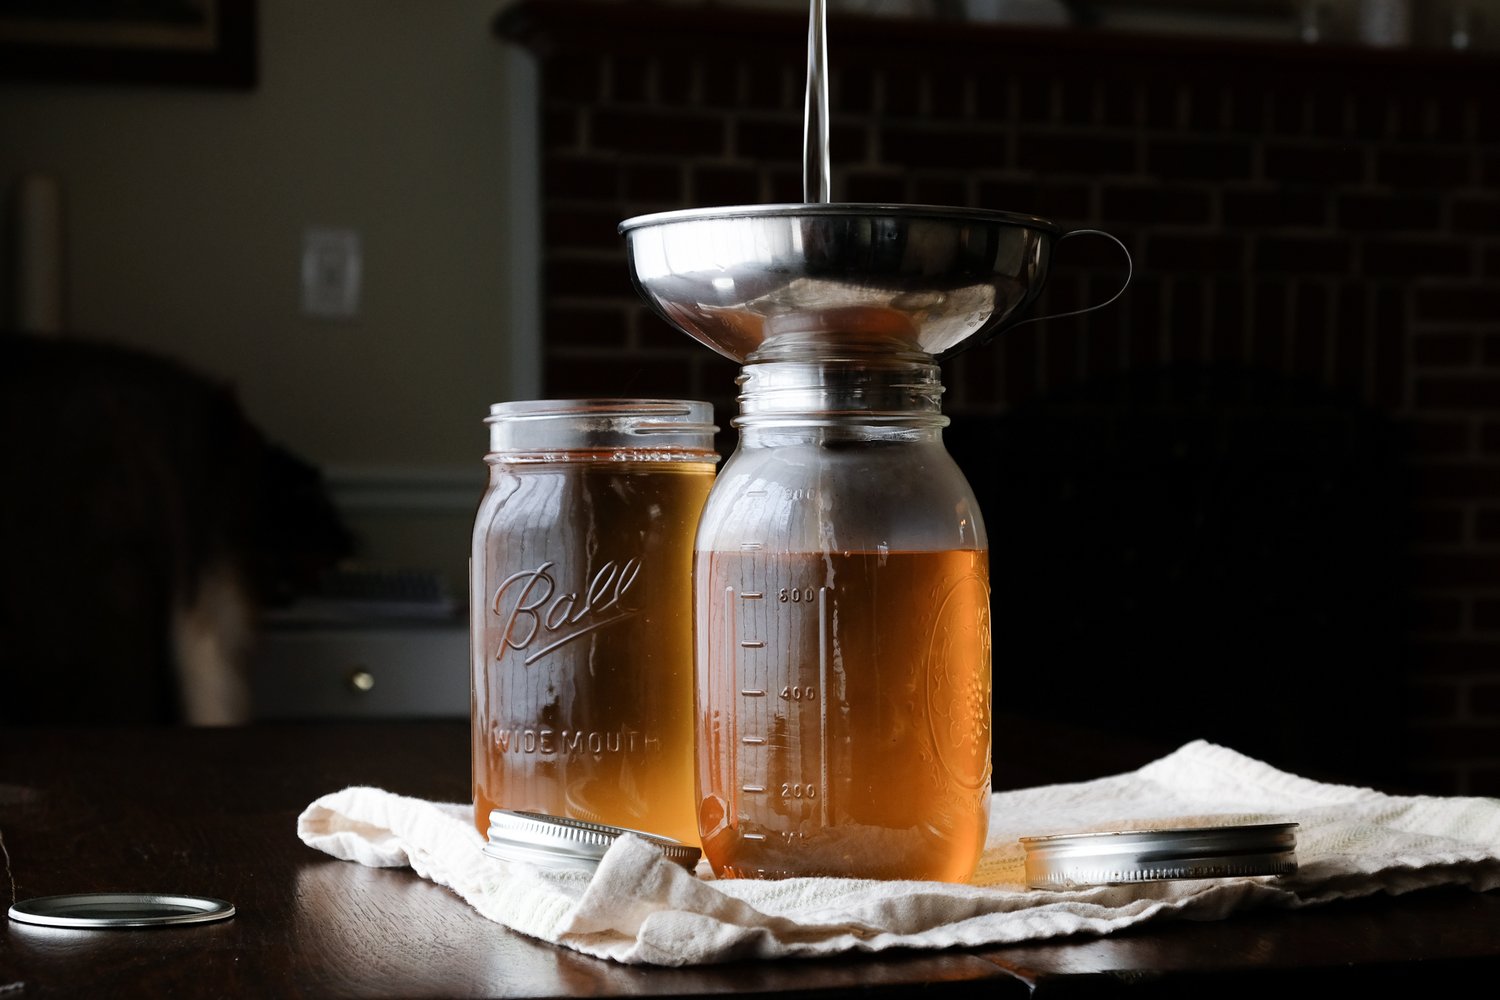
Strain the fat into a heat proof container. We like to double strain the fat by setting a coarse strainer on top of a fine mesh one. The coarse strainer will catch all the large solids and prevent the fine mesh one from getting clogged up.
-
Allow the fat to cool slowly. As it cools, it will turn opaque and solidify.
-
Once completely cooled, you may notice a layer of liquid and small bits of protein trapped under the solidified fat. These impurities will shorten the shelf life of your fat and you’ll want to remove them.
-
To separate the fat from the impurities, use warm water to heat up the sides of the container until the fat is just loose enough to slide out. Use a knife or metal spatula to scrape off the liquid and impurities. The liquid will usually be very gelatinous- this is all the collagen that was present in the fat and meat. You can use it for thickening sauces, stocks and soups.
-
To get an extra clean & stable final product, reheat the fat and pour through a coffee filter.
Dry Rendering:
Dry rendering does not use water as a thermal medium. This method works best when you have a lot of fat to render and when the fat is already separated from skin and meat. Bear, deer, beaver, etc have large stores of fat that can be cut or scraped from the meat and hide. Direct or indirect heat is applied, and the fat is rendered from the solids. Place the fat in a heavy bottomed pan and apply low heat, adjusting as needed until the fat starts to melt. Carefully monitor the fat and scrape the bottom of the pan to avoid burning the solids. The fat should be kept at barely a simmer during this process, until it’s been completely rendered.
-
Place trimmed fat in a wide heavy bottomed pan and apply low to medium heat.
-
As the fat starts to melt, stir and adjust heat to maintain a very slow simmer.
-
As the fat turns to liquid, it will fill in the space between the un-rendered fat. This will distribute the heat evenly. Partially covering with a lid will help retain heat especially if doing a large batch. You don’t want to completely cover it with the lid- if there is any water in the fat you want it to escape as steam.
-
Adjust heat to a bare simmer, stirring occasionally to keep the fat from sticking to the bottom. If the fat has water in it, it will bubble. This is fine, you’ll know the water is gone when it stops bubbling.
-
Keep checking your fat until it looks like it’s all rendered. Depending on how much meat and skin was left on it, there may be some solids floating in the pot, but otherwise it should be a clear yellowish liquid.
-
Strain the fat into a heat proof container. We like to double strain the fat by setting a coarse strainer on top of a fine mesh one. The coarse strainer will catch all the large solids and prevent the fine mesh one from getting clogged up.
-
Allow the fat to cool slowly. As it cools, it will turn opaque and solidify.
-
Once completely cooled, you may notice a layer of liquid or small bits of protein trapped under the solidified fat. These impurities will shorten the shelf life of your fat and you’ll want to remove them.
-
To separate the fat from the impurities, use warm water to heat up the sides of the container until the fat is just loose enough to slide out. Use a knife or metal spatula to scrape off the water. The liquid will usually be very gelatinous- this is all the collagen that was present in the fat and meat. You can use it for thickening sauces, stocks and soups.
-
To get an extra clean & stable final product, reheat the fat and pour through a coffee filter.
Storage:
Rendered fat will store indefinitely in the freezer or refrigerated. Properly rendered fat is also shelf stable for quite some time. Fats will absorb smells and flavors, so storing them in airtight containers is important.
Read the full article here